Good morning! Good morning! It is amazing how quickly the 25th of each month arrives, especially since I have started the Year-Round Christmas Challenge. At least this month’s challenge project is actually getting posted in the right month. Woo-Hoo!
This month’s project was going to be an easy, fun project with the kids and grandbaby. But, plans change.
I love my 2 Christmas pillows printed with reindeer heads: baby feet for the heads and baby hands for the antlers. I have lots of wrapping paper, but matching wrapping paper could have been a cute and fun outdoor project.
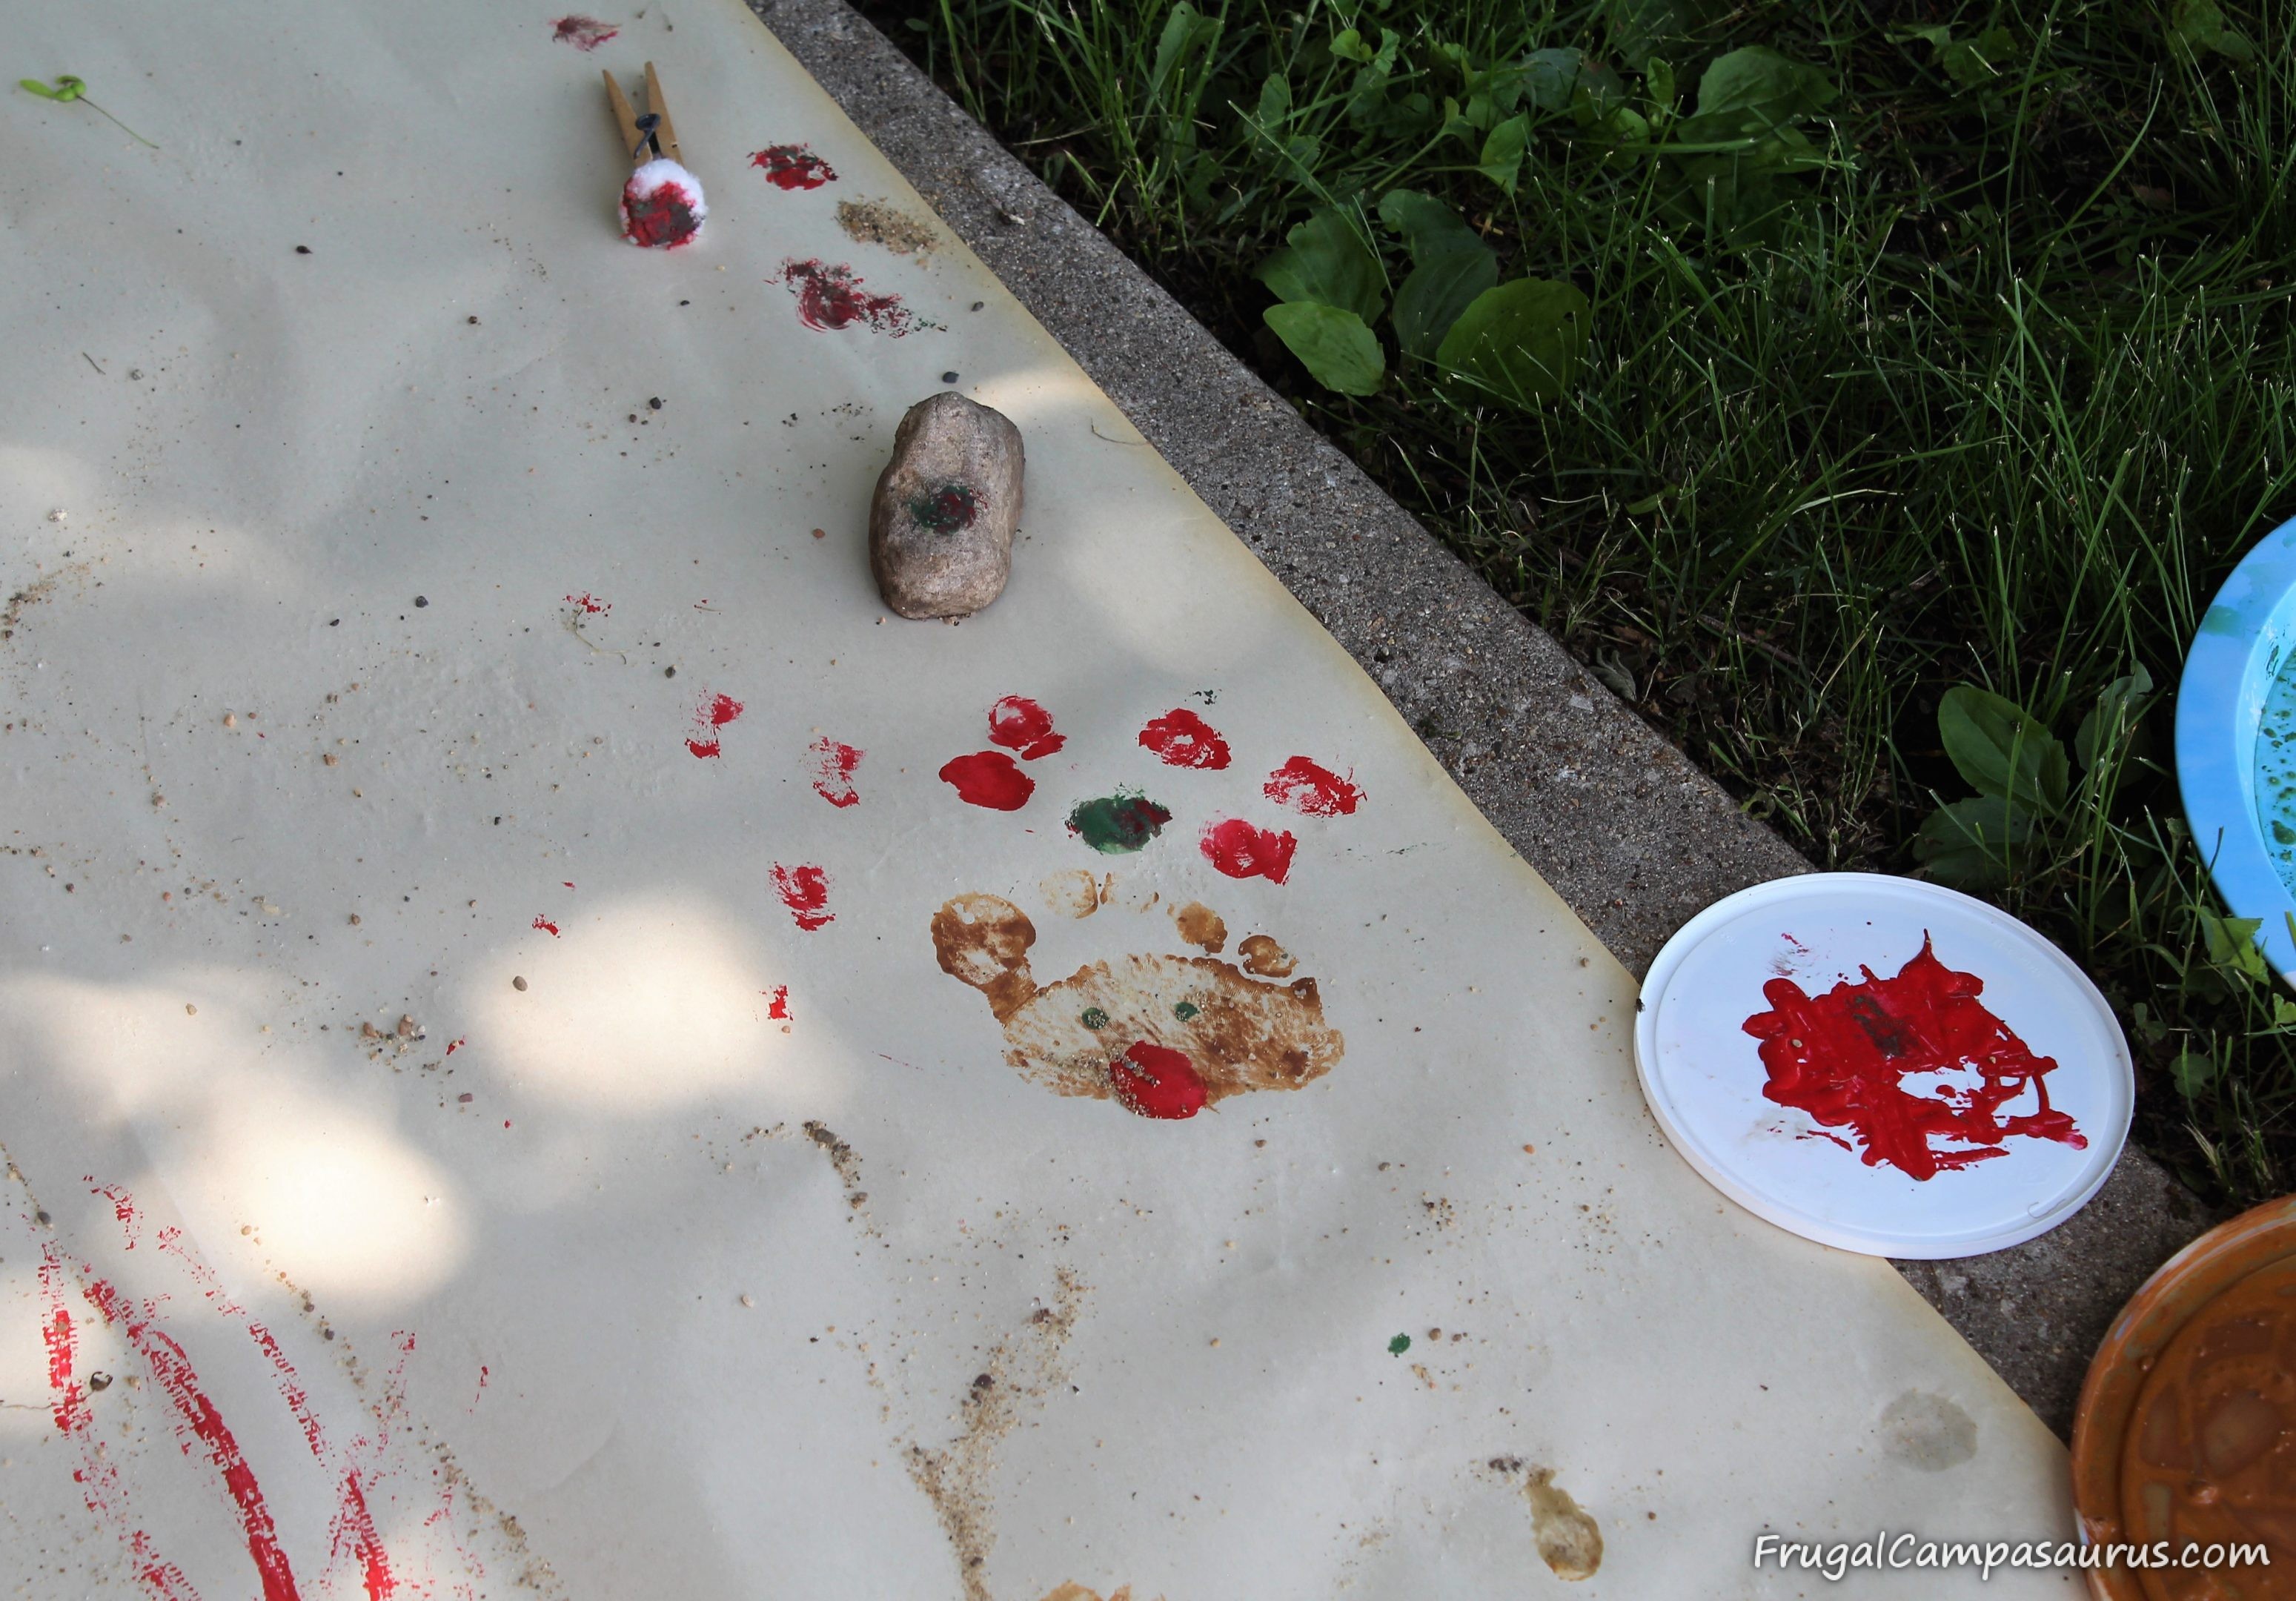
It was fun for a while. Grandbaby helped me hold down the newsprint ($2 end rolls from a local newspaper printer) with rocks and tried squeezing paint onto old plastic lids. Then, I made a reindeer example with my foot- and the grandbaby was gone!
“No, No, No! Play in the sandbox!” Paint was not going on those cute feet or hands to make reindeer wrapping paper!
20 minutes later, after showing grandbaby my clean foot (repeatedly) and saying “Let’s try cars, not feet” (repeatedly), we tried again.
My back-up plan was using sandbox cars and trucks to make red and green tire tracks on wrapping paper. It’s good to have a back-up plan and be flexible with kids, very flexible.
Most of the cars were dipped in paint, “dirty”, then directly placed in the water bucket. Then grandbaby would run to the sandbox for more cars! Only a few were ‘raced’ on the paper to make pretty tracks.
At least it was fun! And the cars got washed!
Now, I have a 3 foot section of wrapping paper- mostly painted circles (reindeer noses) and a few tire tracks- and of course, my 3 reindeer examples that scared the grandbaby.
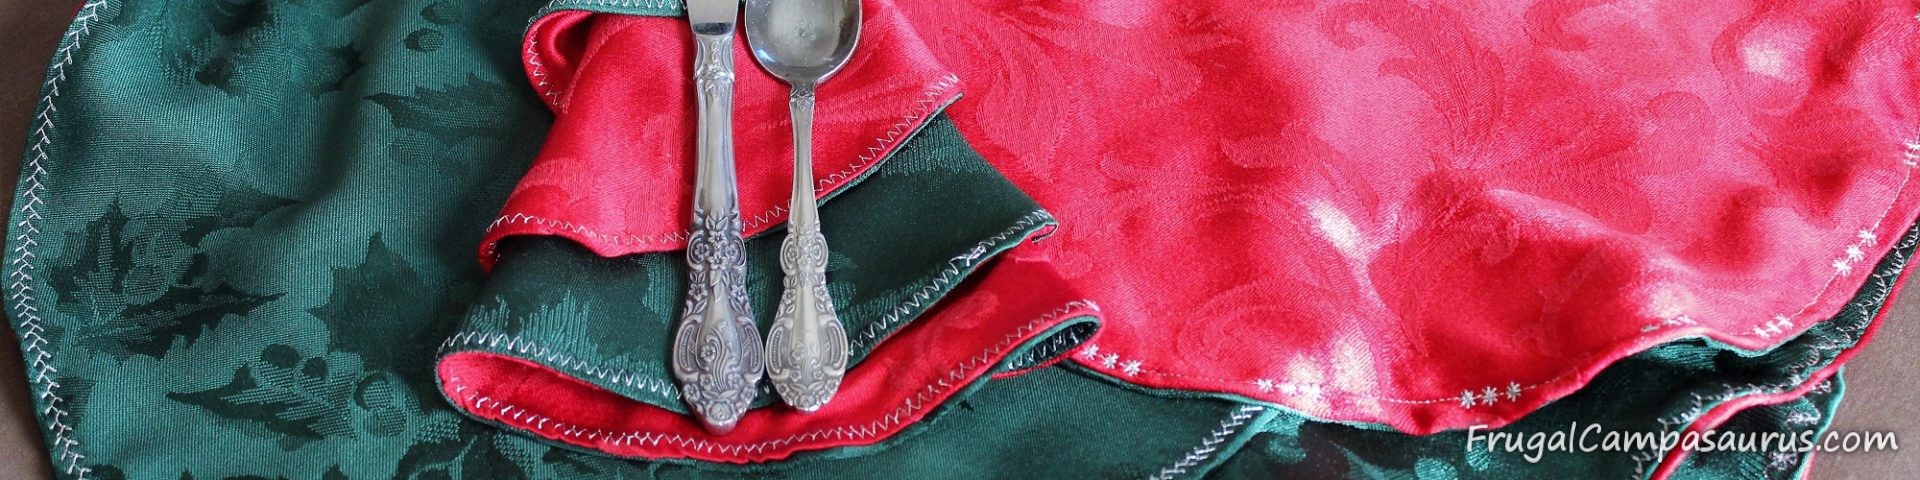
Thankfully, plans can change. After the wrapping paper fail, I decided to remake my Christmas napkins. They finally turned out great!
Last December, I attempted to add fabric border to some pretty garage sale napkins. I liked the green fabric, just not the hem. It was a rough zigzag sewn edge; ok, but not pretty. My fabric border was worse though, the corners were curvy and cupped –not pointy. I also tried sewing both sides of bias tape at the same time. It’s something I still need to practice: I missed the back fabric often. Thankfully, I only did 1 napkin, and then gave up.
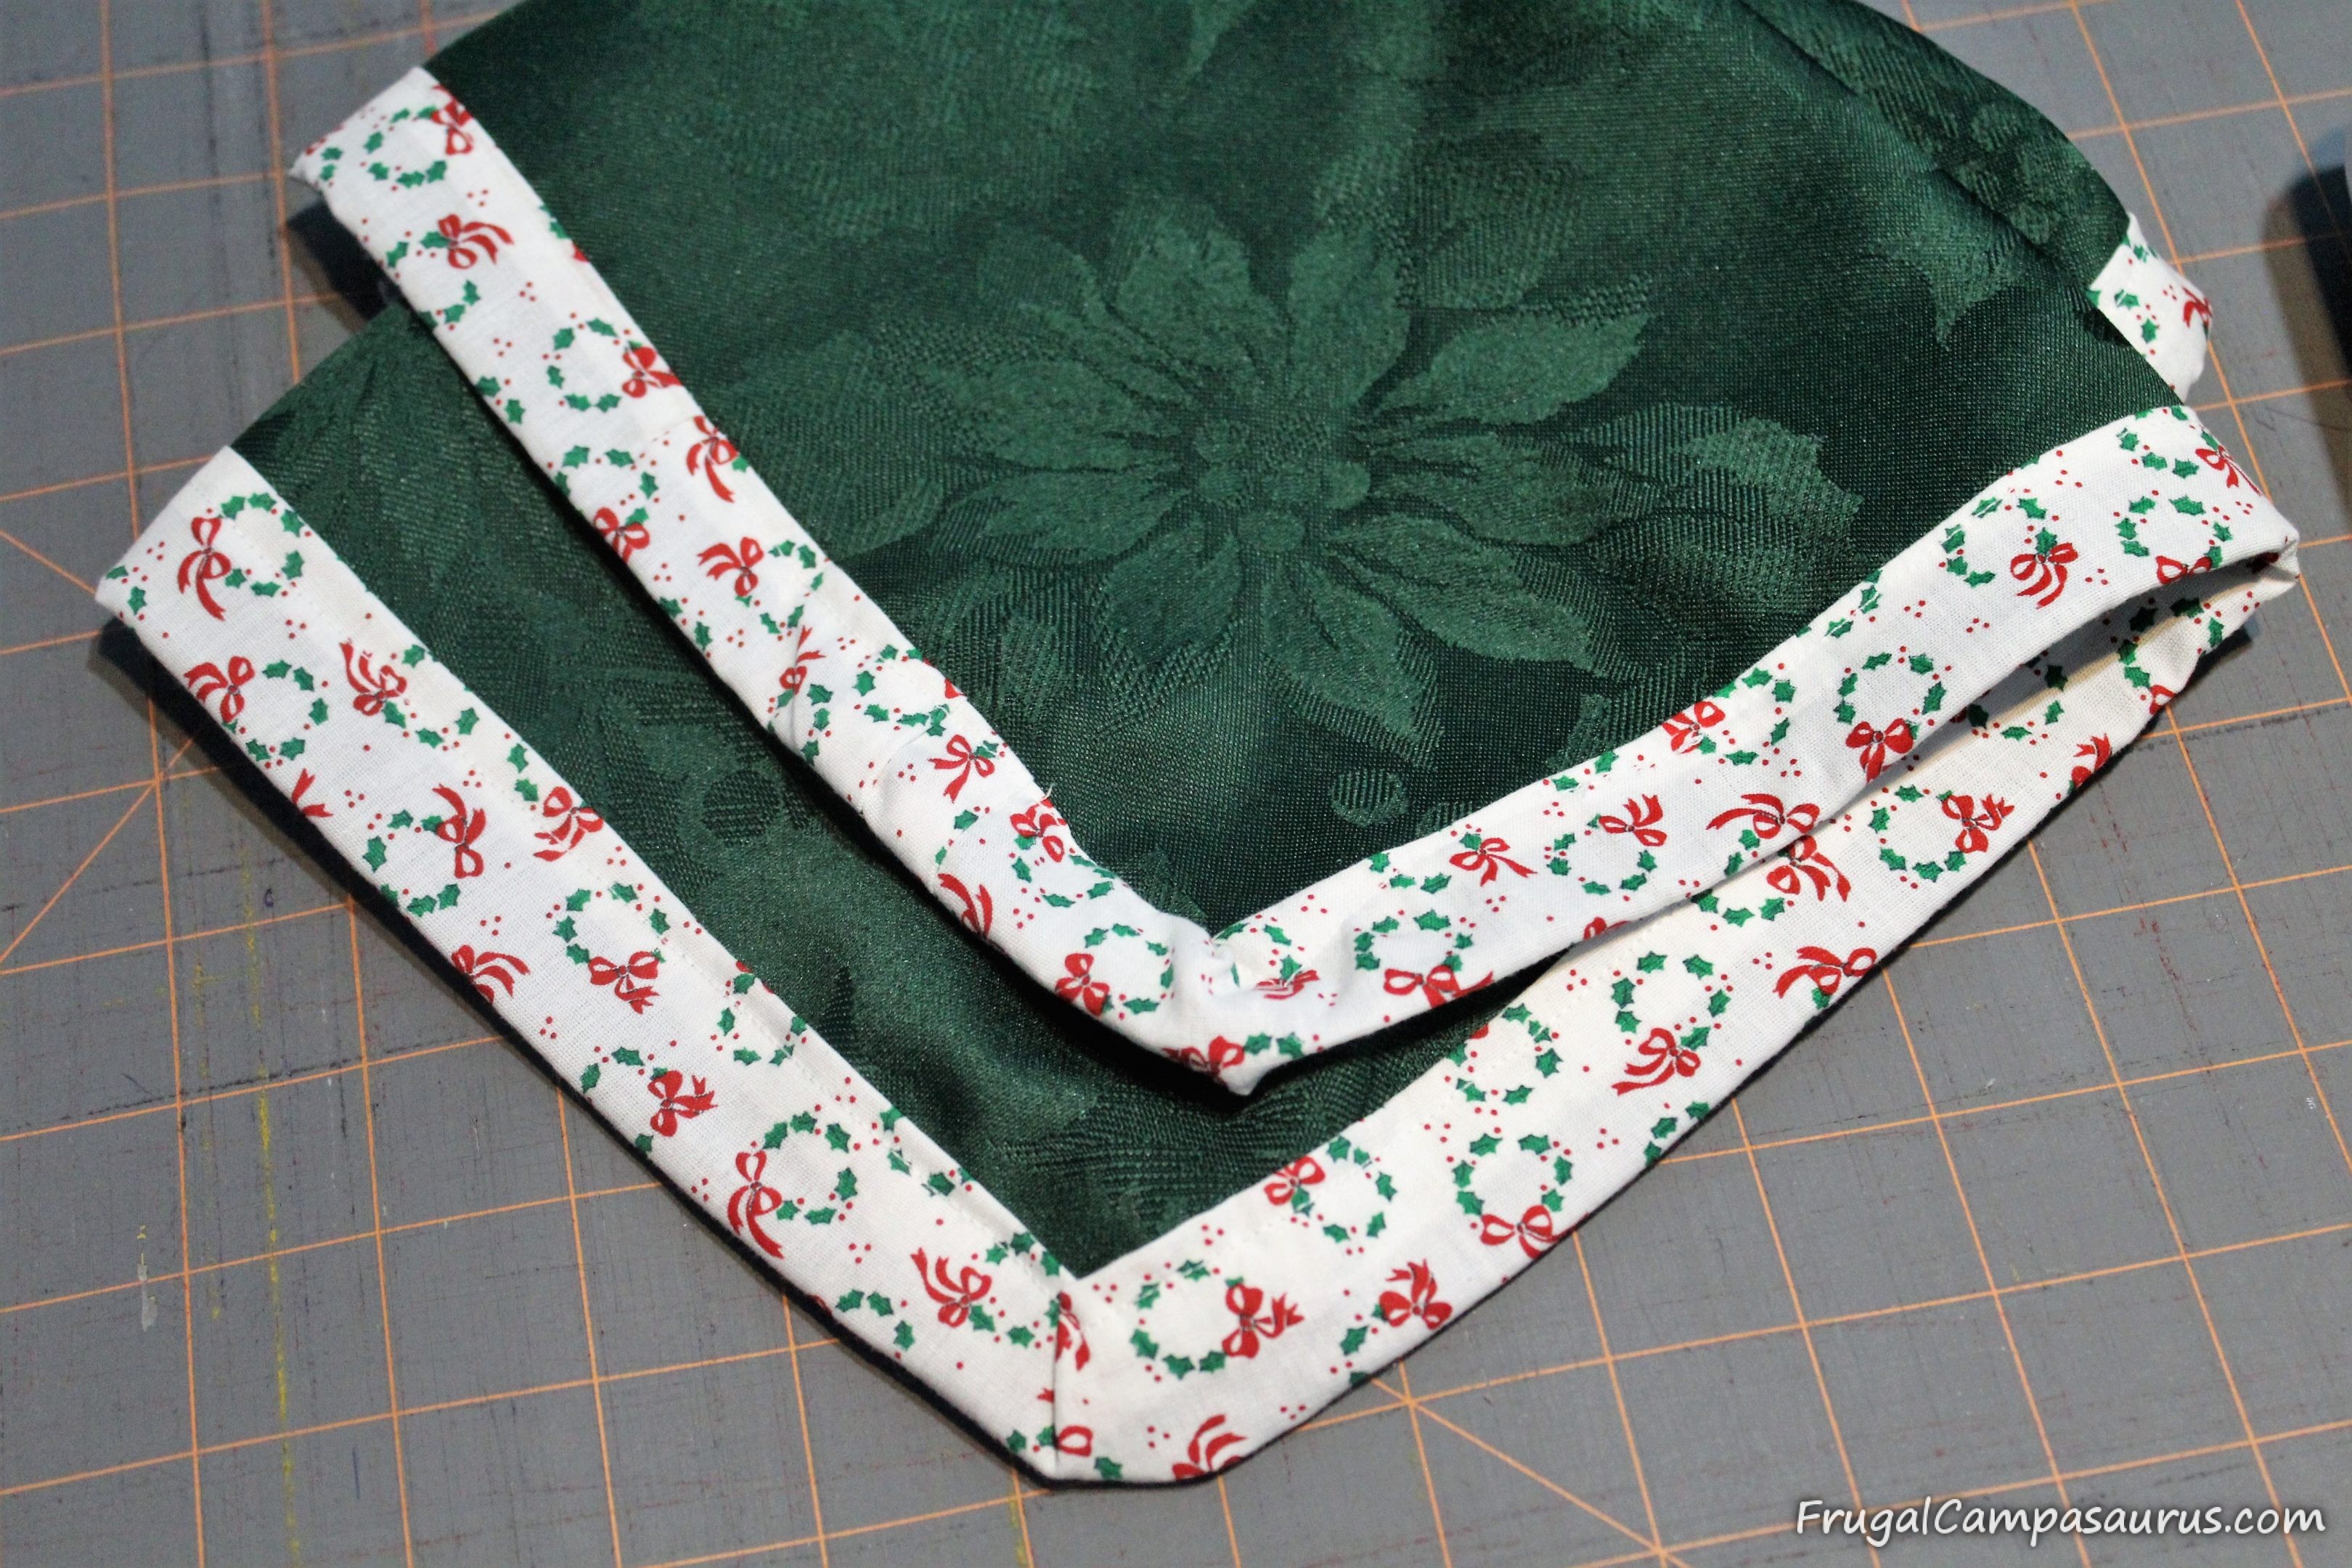
This time, I avoided bias tape and made circle napkins, which will fold into Christmas trees! Sooo cute and sooo much easier!
This May Christmas project was frugal. I had everything:
- Soap slivers to mark fabric
- Garage sale green napkins
- Garage sale red tablecloth, much easier to find than the Christmas fabric that has been on my To Buy list for 2 years
- Silver thread, leftover from embroidering a flower girl dress, though white thread would also be pretty
The Christmas napkins were also an easy project: sew circles, turn inside out and add a decorative edging.
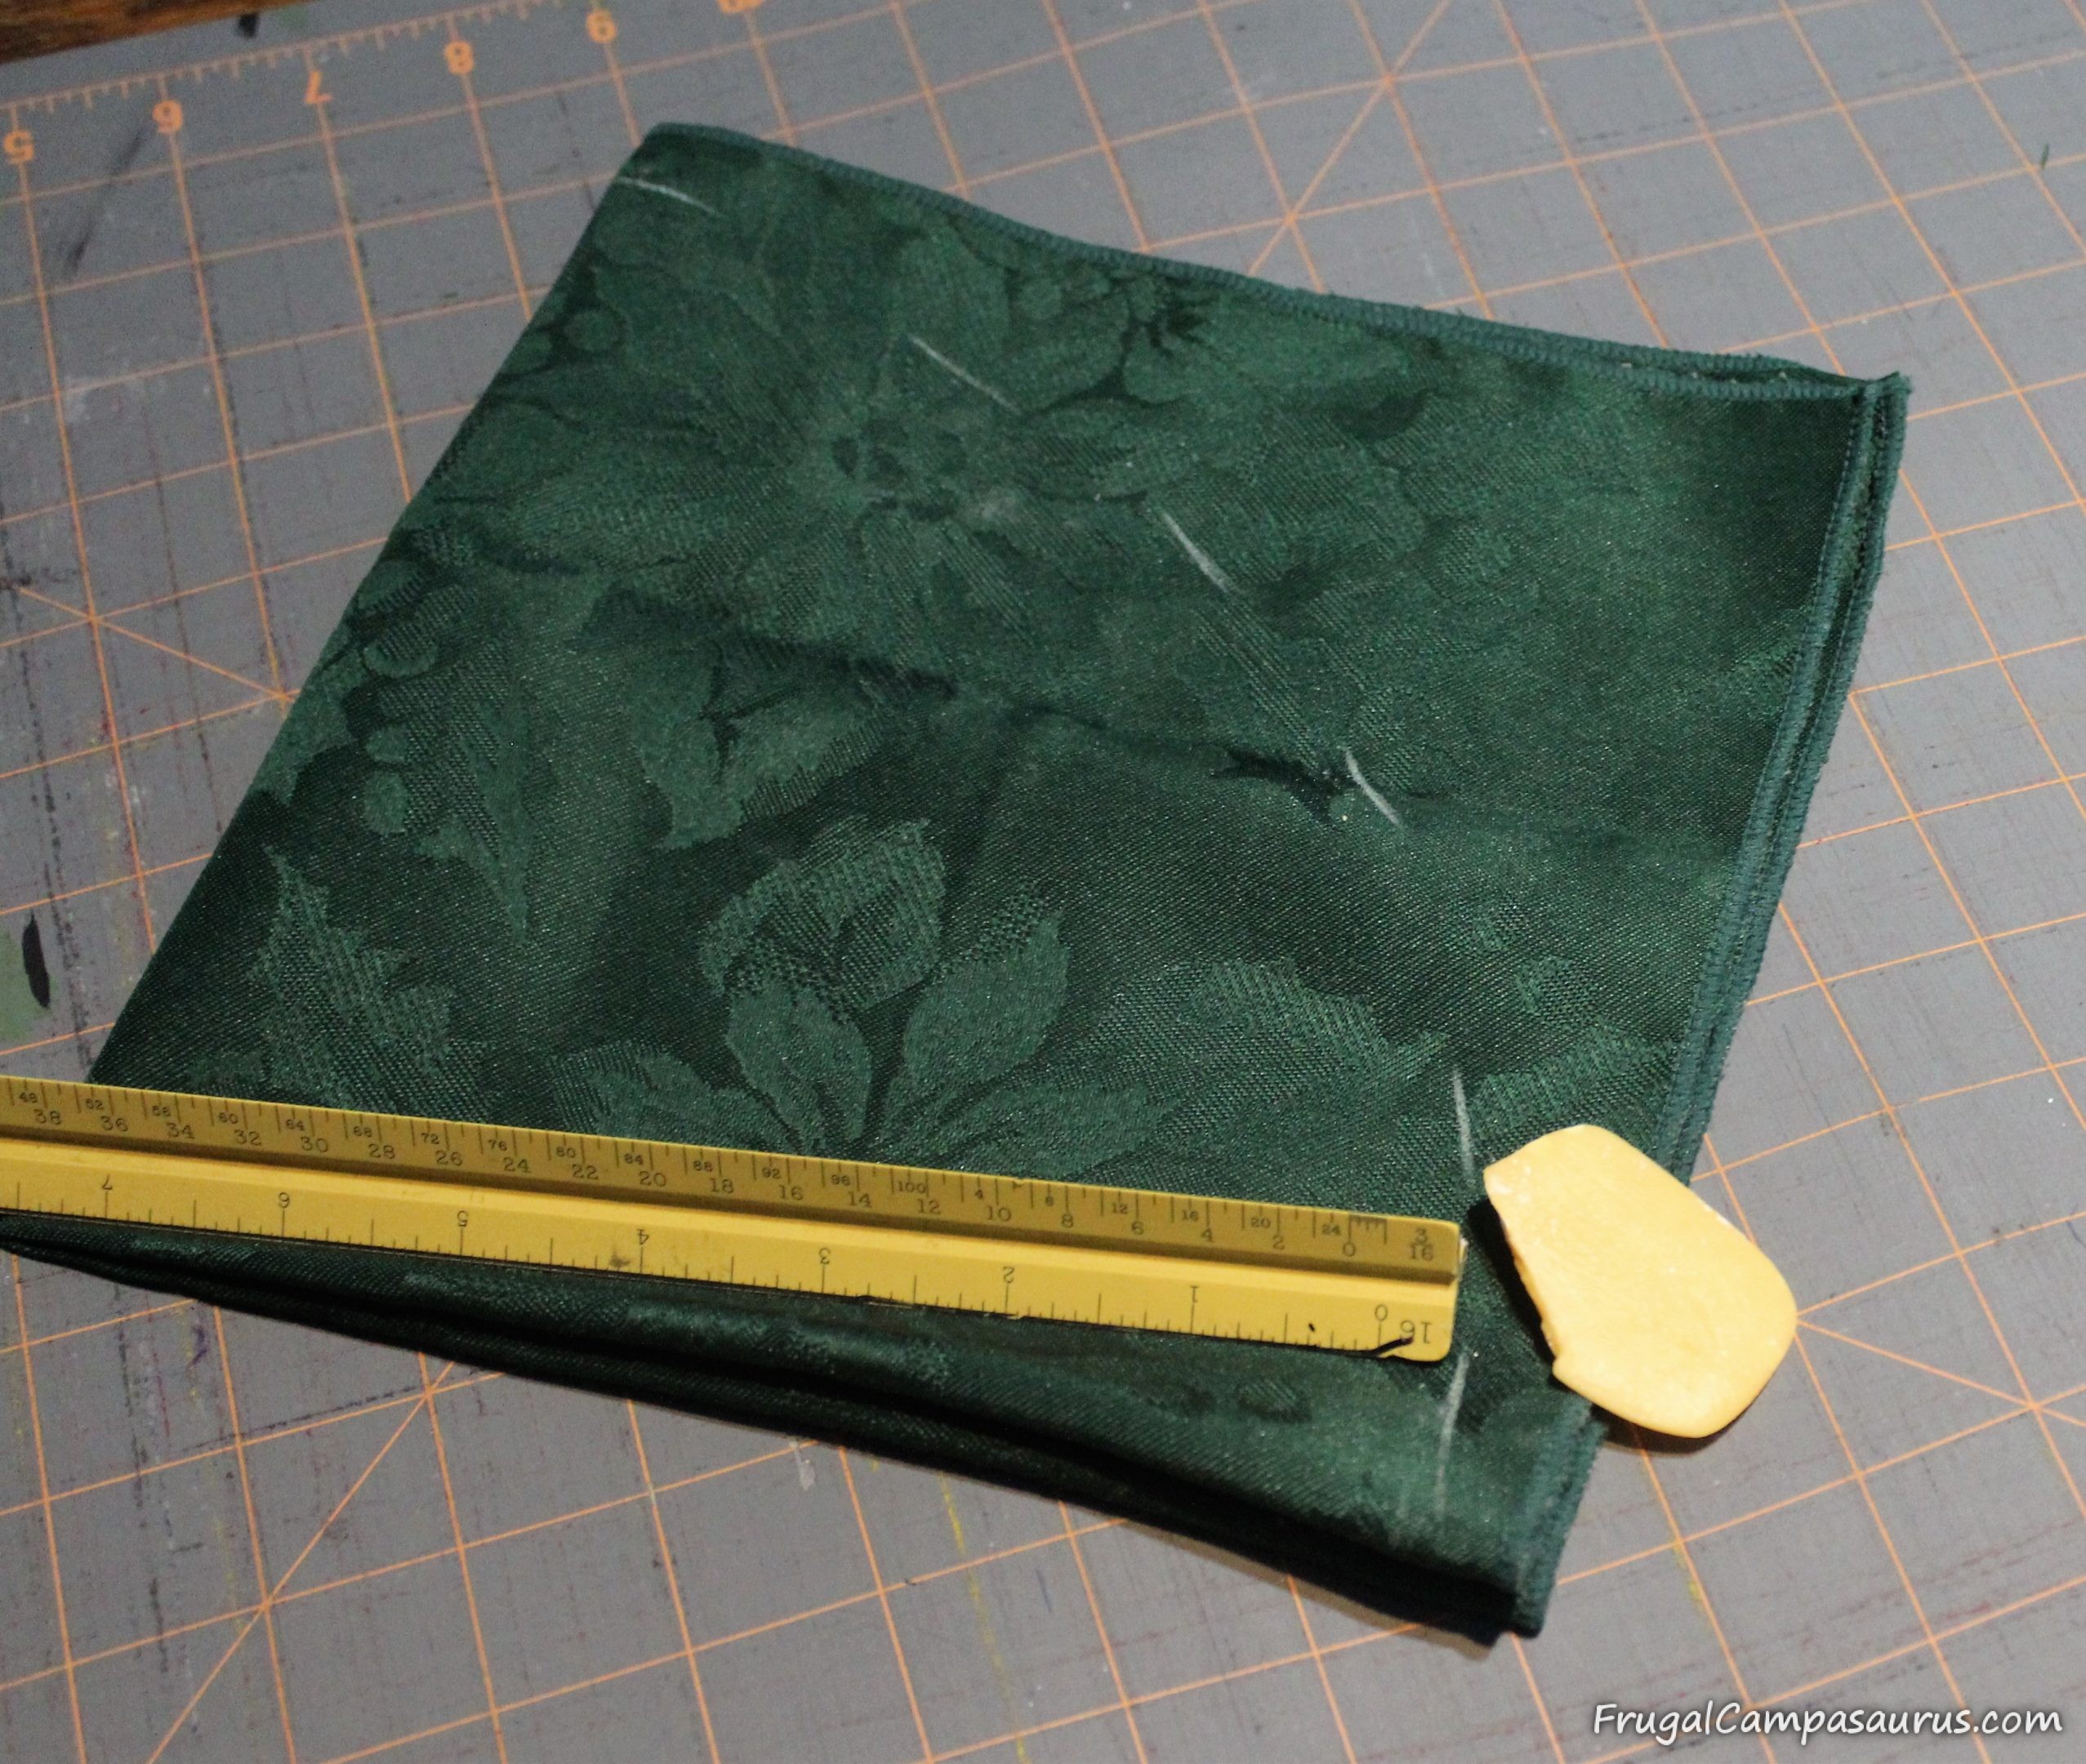
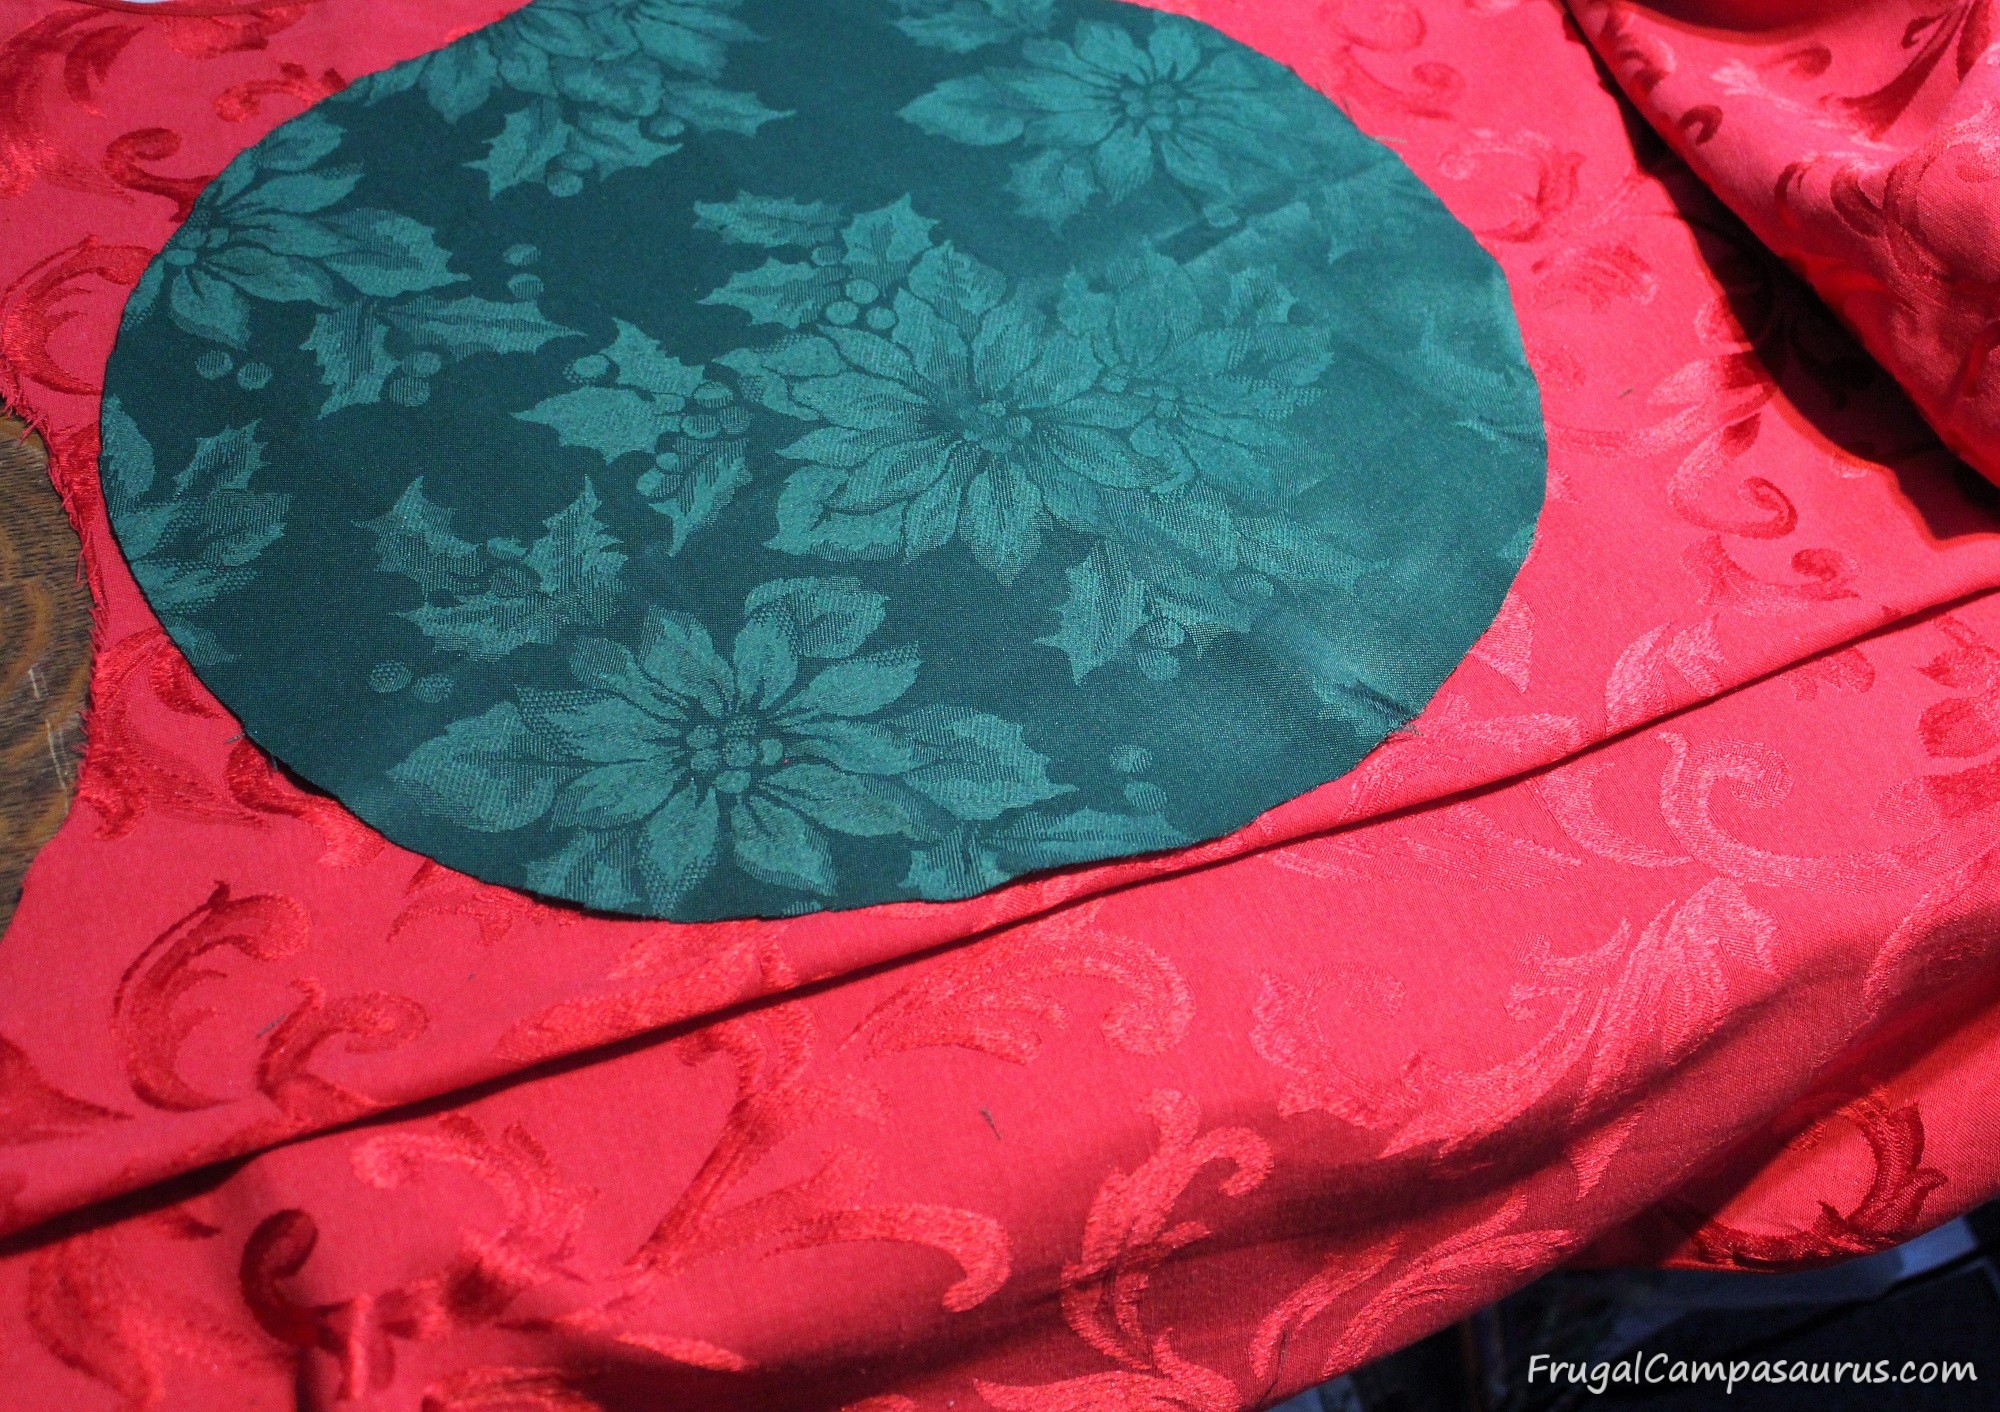
First, I cut the roughly 17’ napkins into circles. The napkins were not square and not even the same size! So, I started by folding them in half and then in half again, to make a square-ish shape. The folded point will eventually be the center of the circle. I measured the shortest folded side from the point, that is the radius of the circle. Using a soap sliver, I marked this distance in an arc shape from the center of circle and going across from one folded side to the other stacked folded side.
I folded and cut my first circle into 8ths ,but it was too many fabric layers to cut. I folded the second one in 4ths, this was much easier to cut and make a circle.
After I had a circle-ish shape, I used it as a template to cut around the rest of the circles. I didn’t trace the template; I just laid it on 3 layers of fabric and cut around it. The extra fabric is trimmed off after sewing, so I wasn’t too exact.
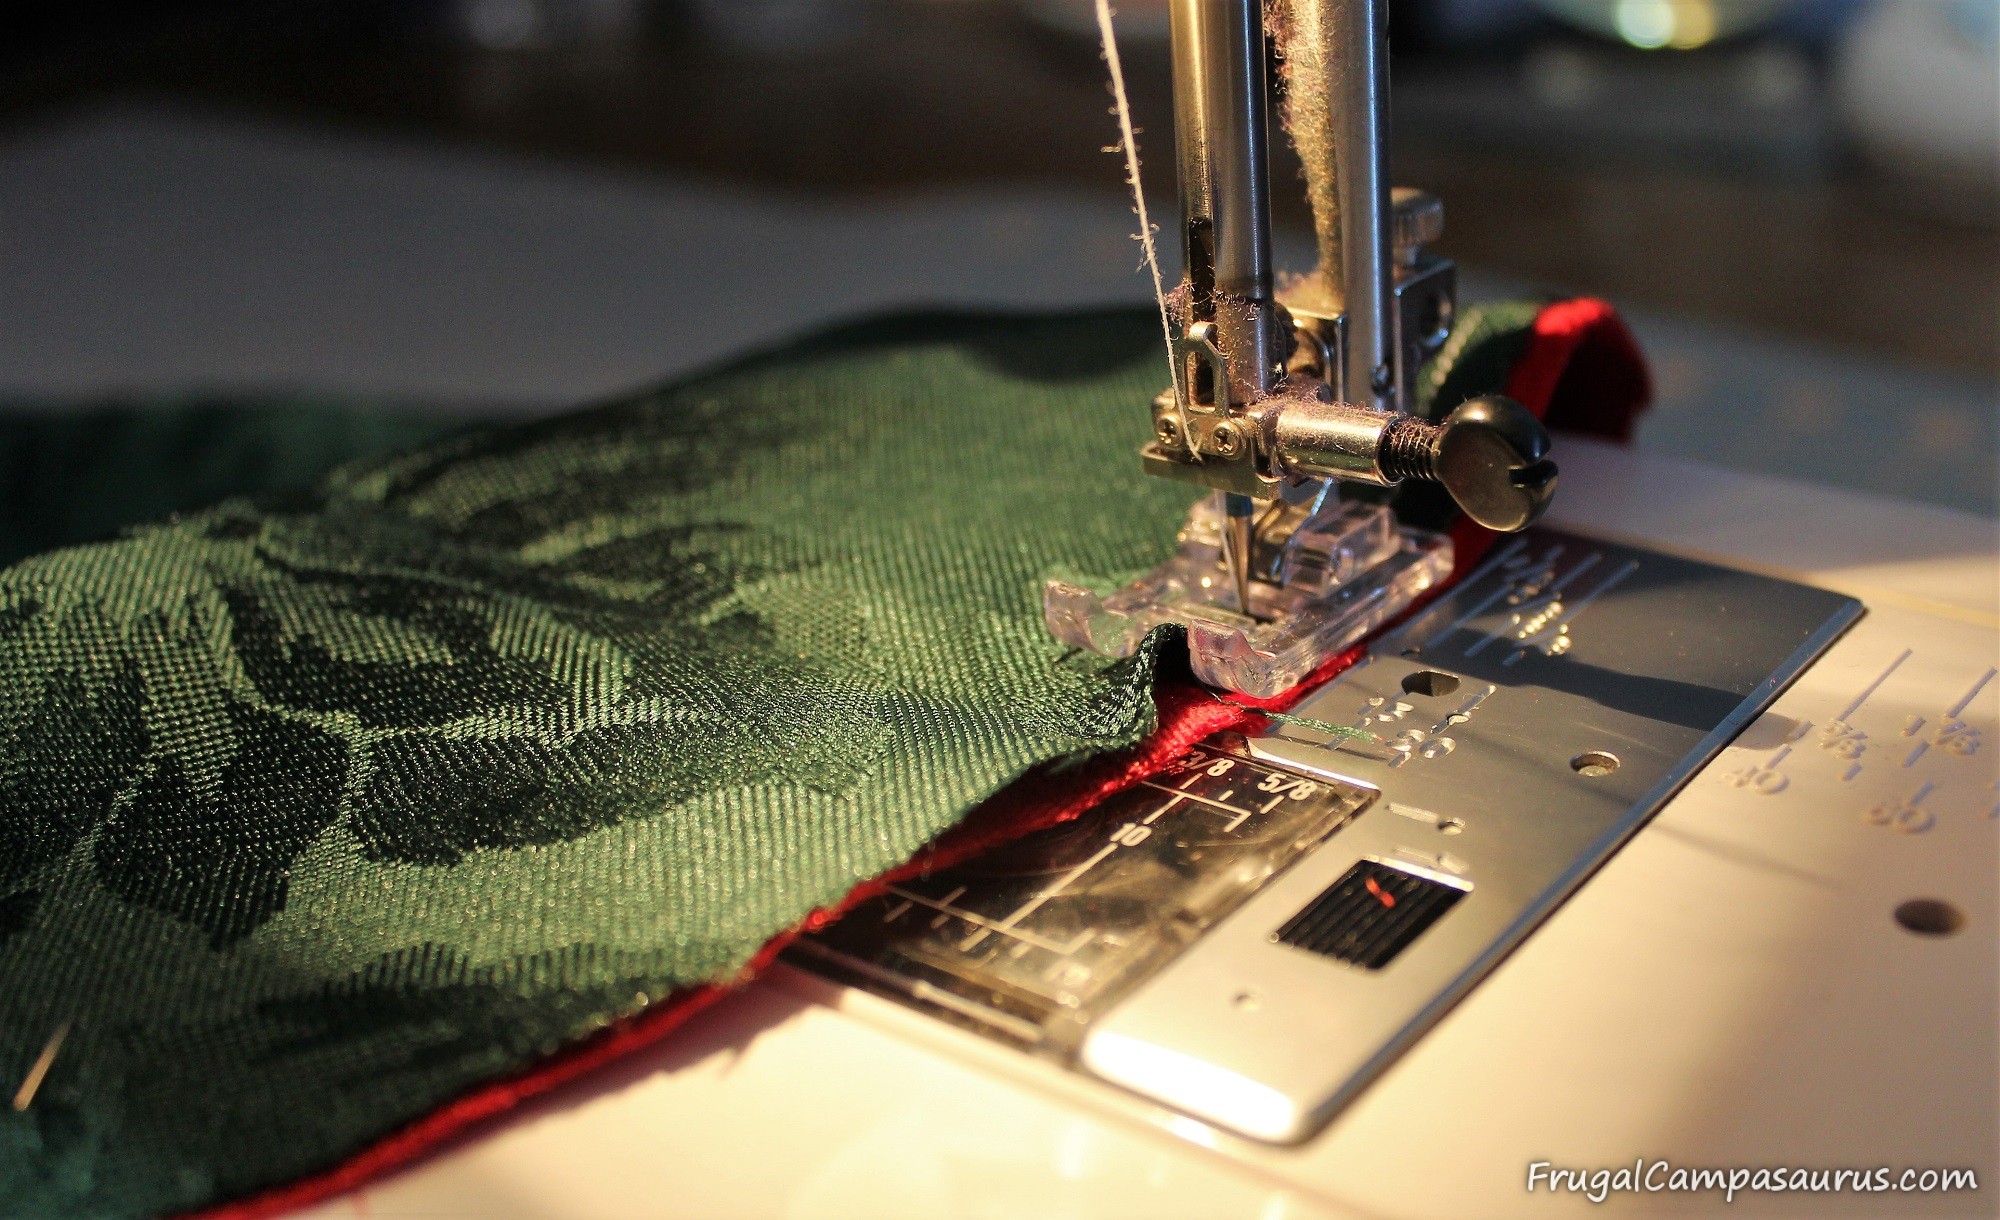
Since I will turn the circles inside out when I am done sewing, I placed the right (pretty) sides together. I sewed around the circle, leaving a 3 inch gap to later turn the napkins inside out.
I did pin the circles together every 3-4 inches. I don’t like to pin, but the first napkin really moved and stretched without the pins. I’m also not sure what type of fabric the garage sale tablecloth and napkins are, but as I sewed-it would pucker.
To get rid of the puckering, I removed a pin, lowered the needle and raised the pressure foot. Then, I could gently pull and smooth out the fabric and resume sewing. I only had to do this 3-4 times for each napkin, and then they turned out fine.
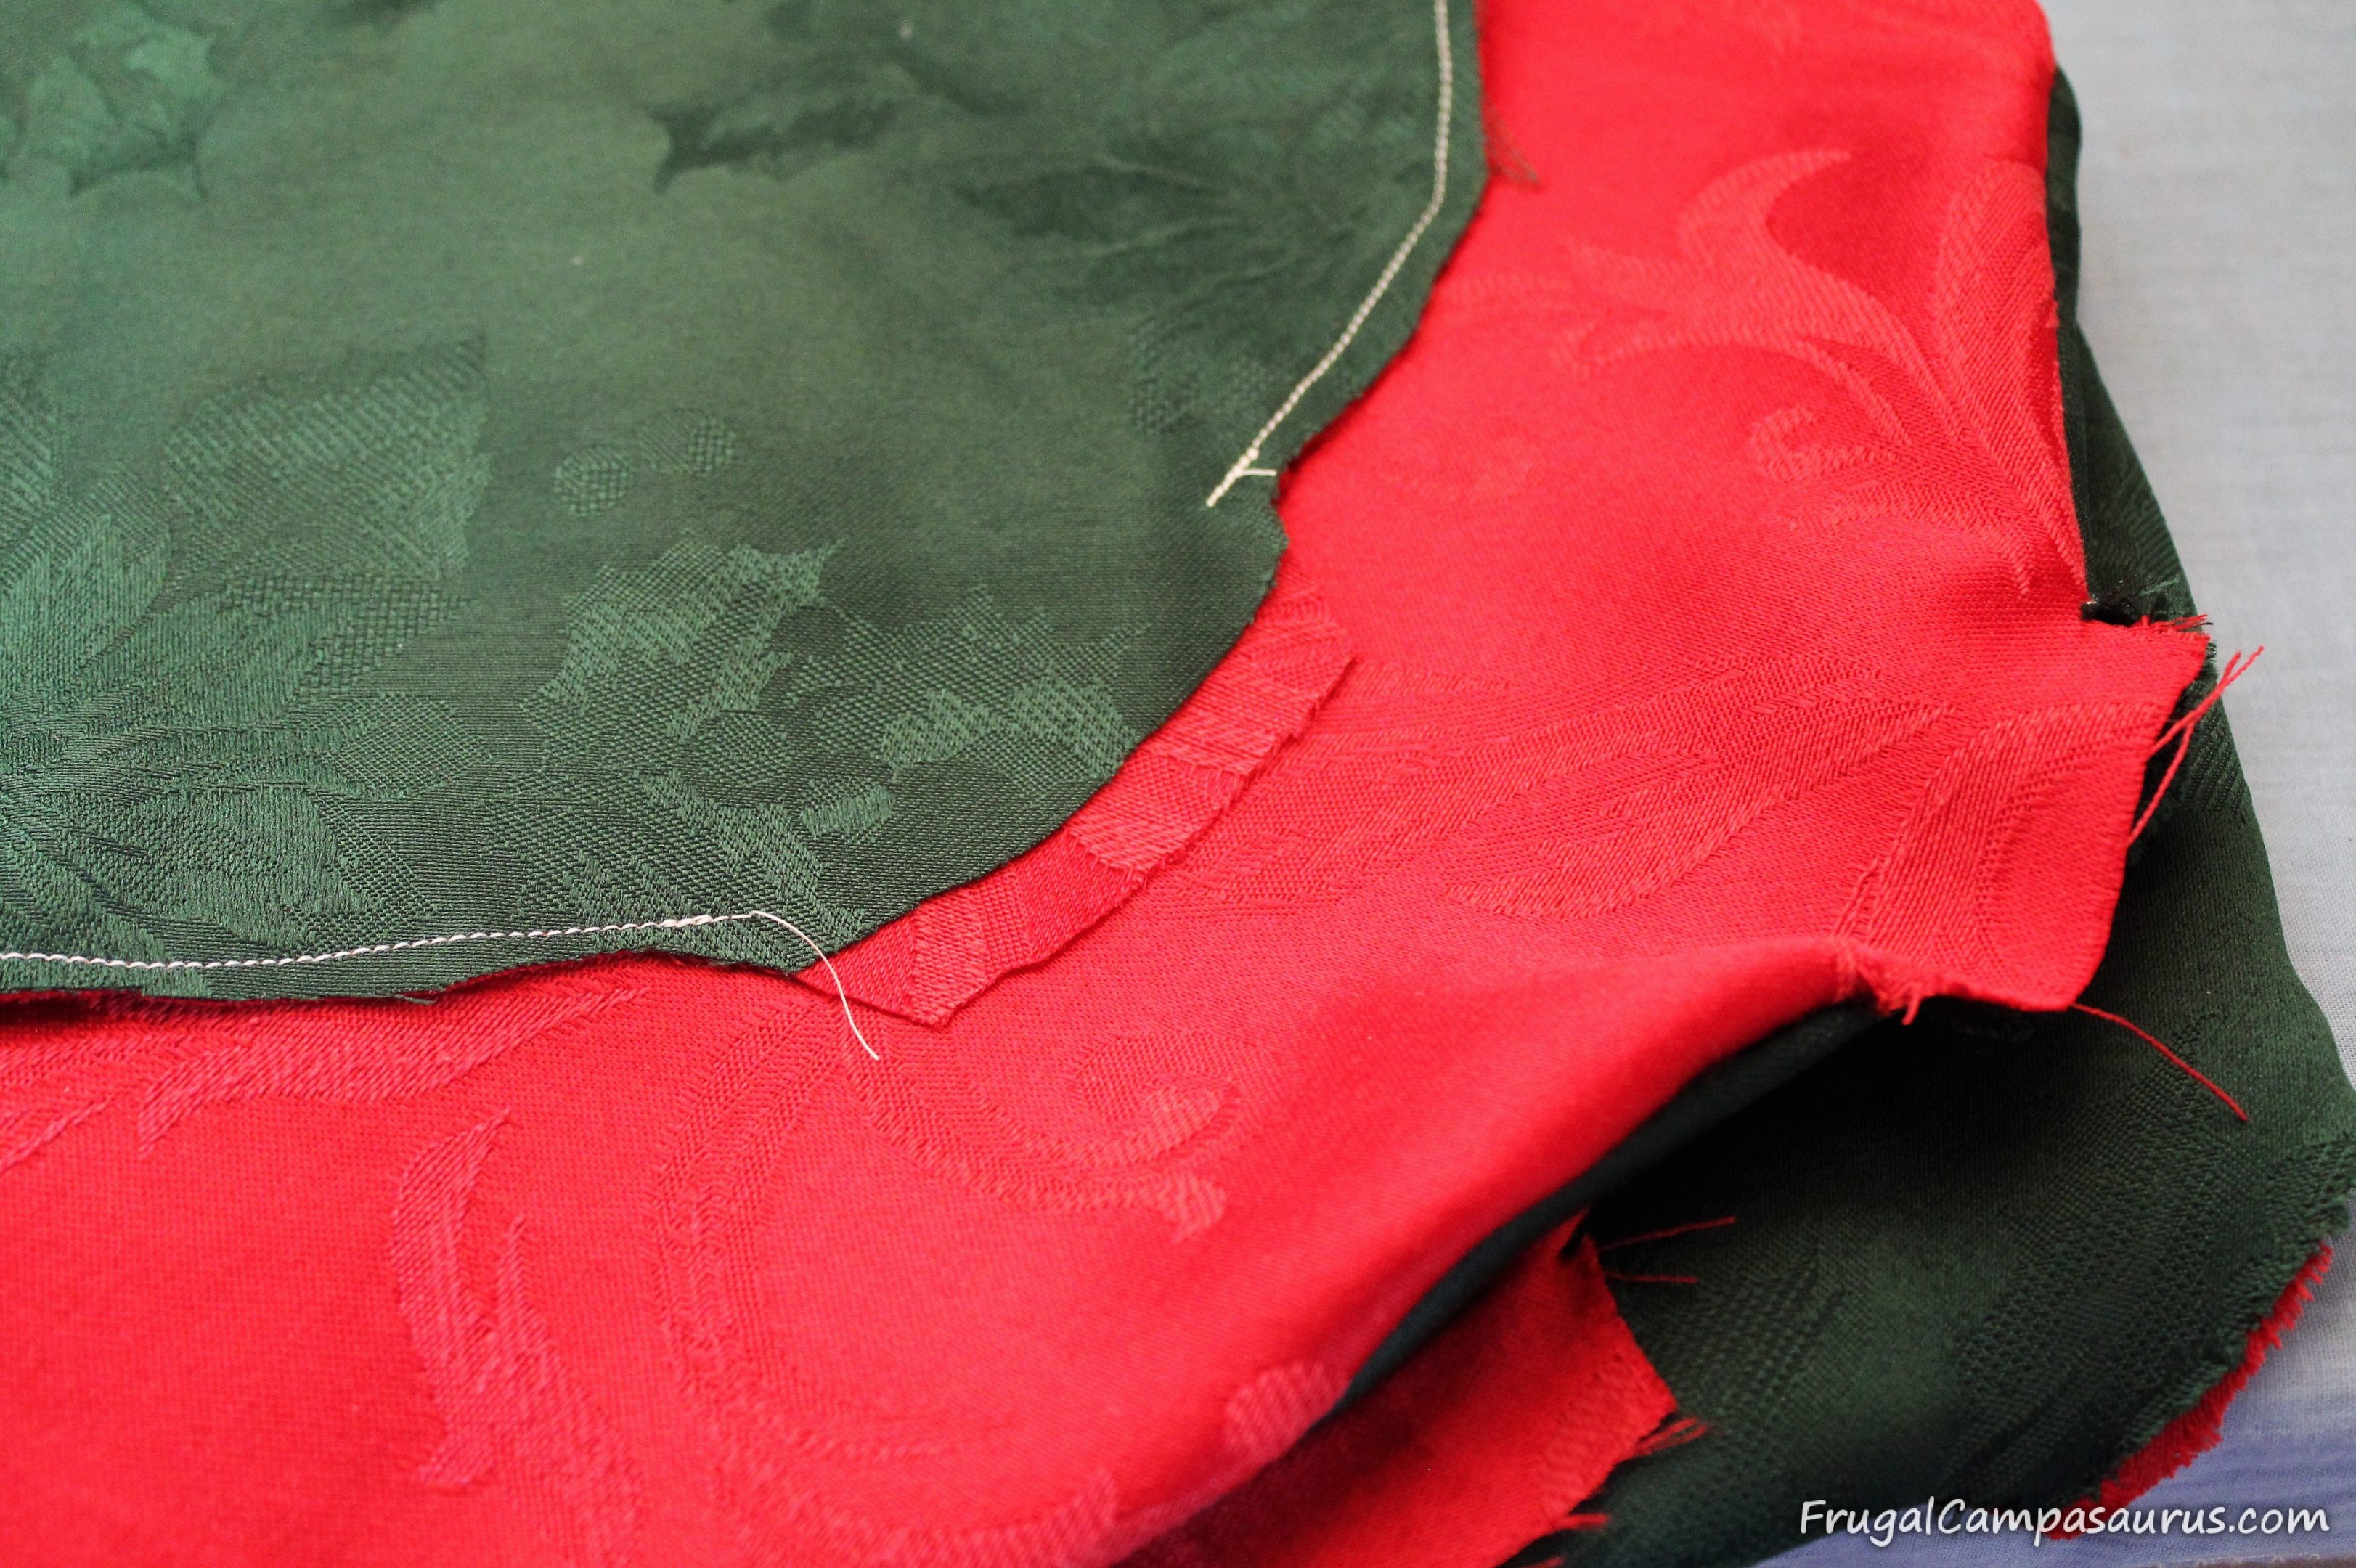
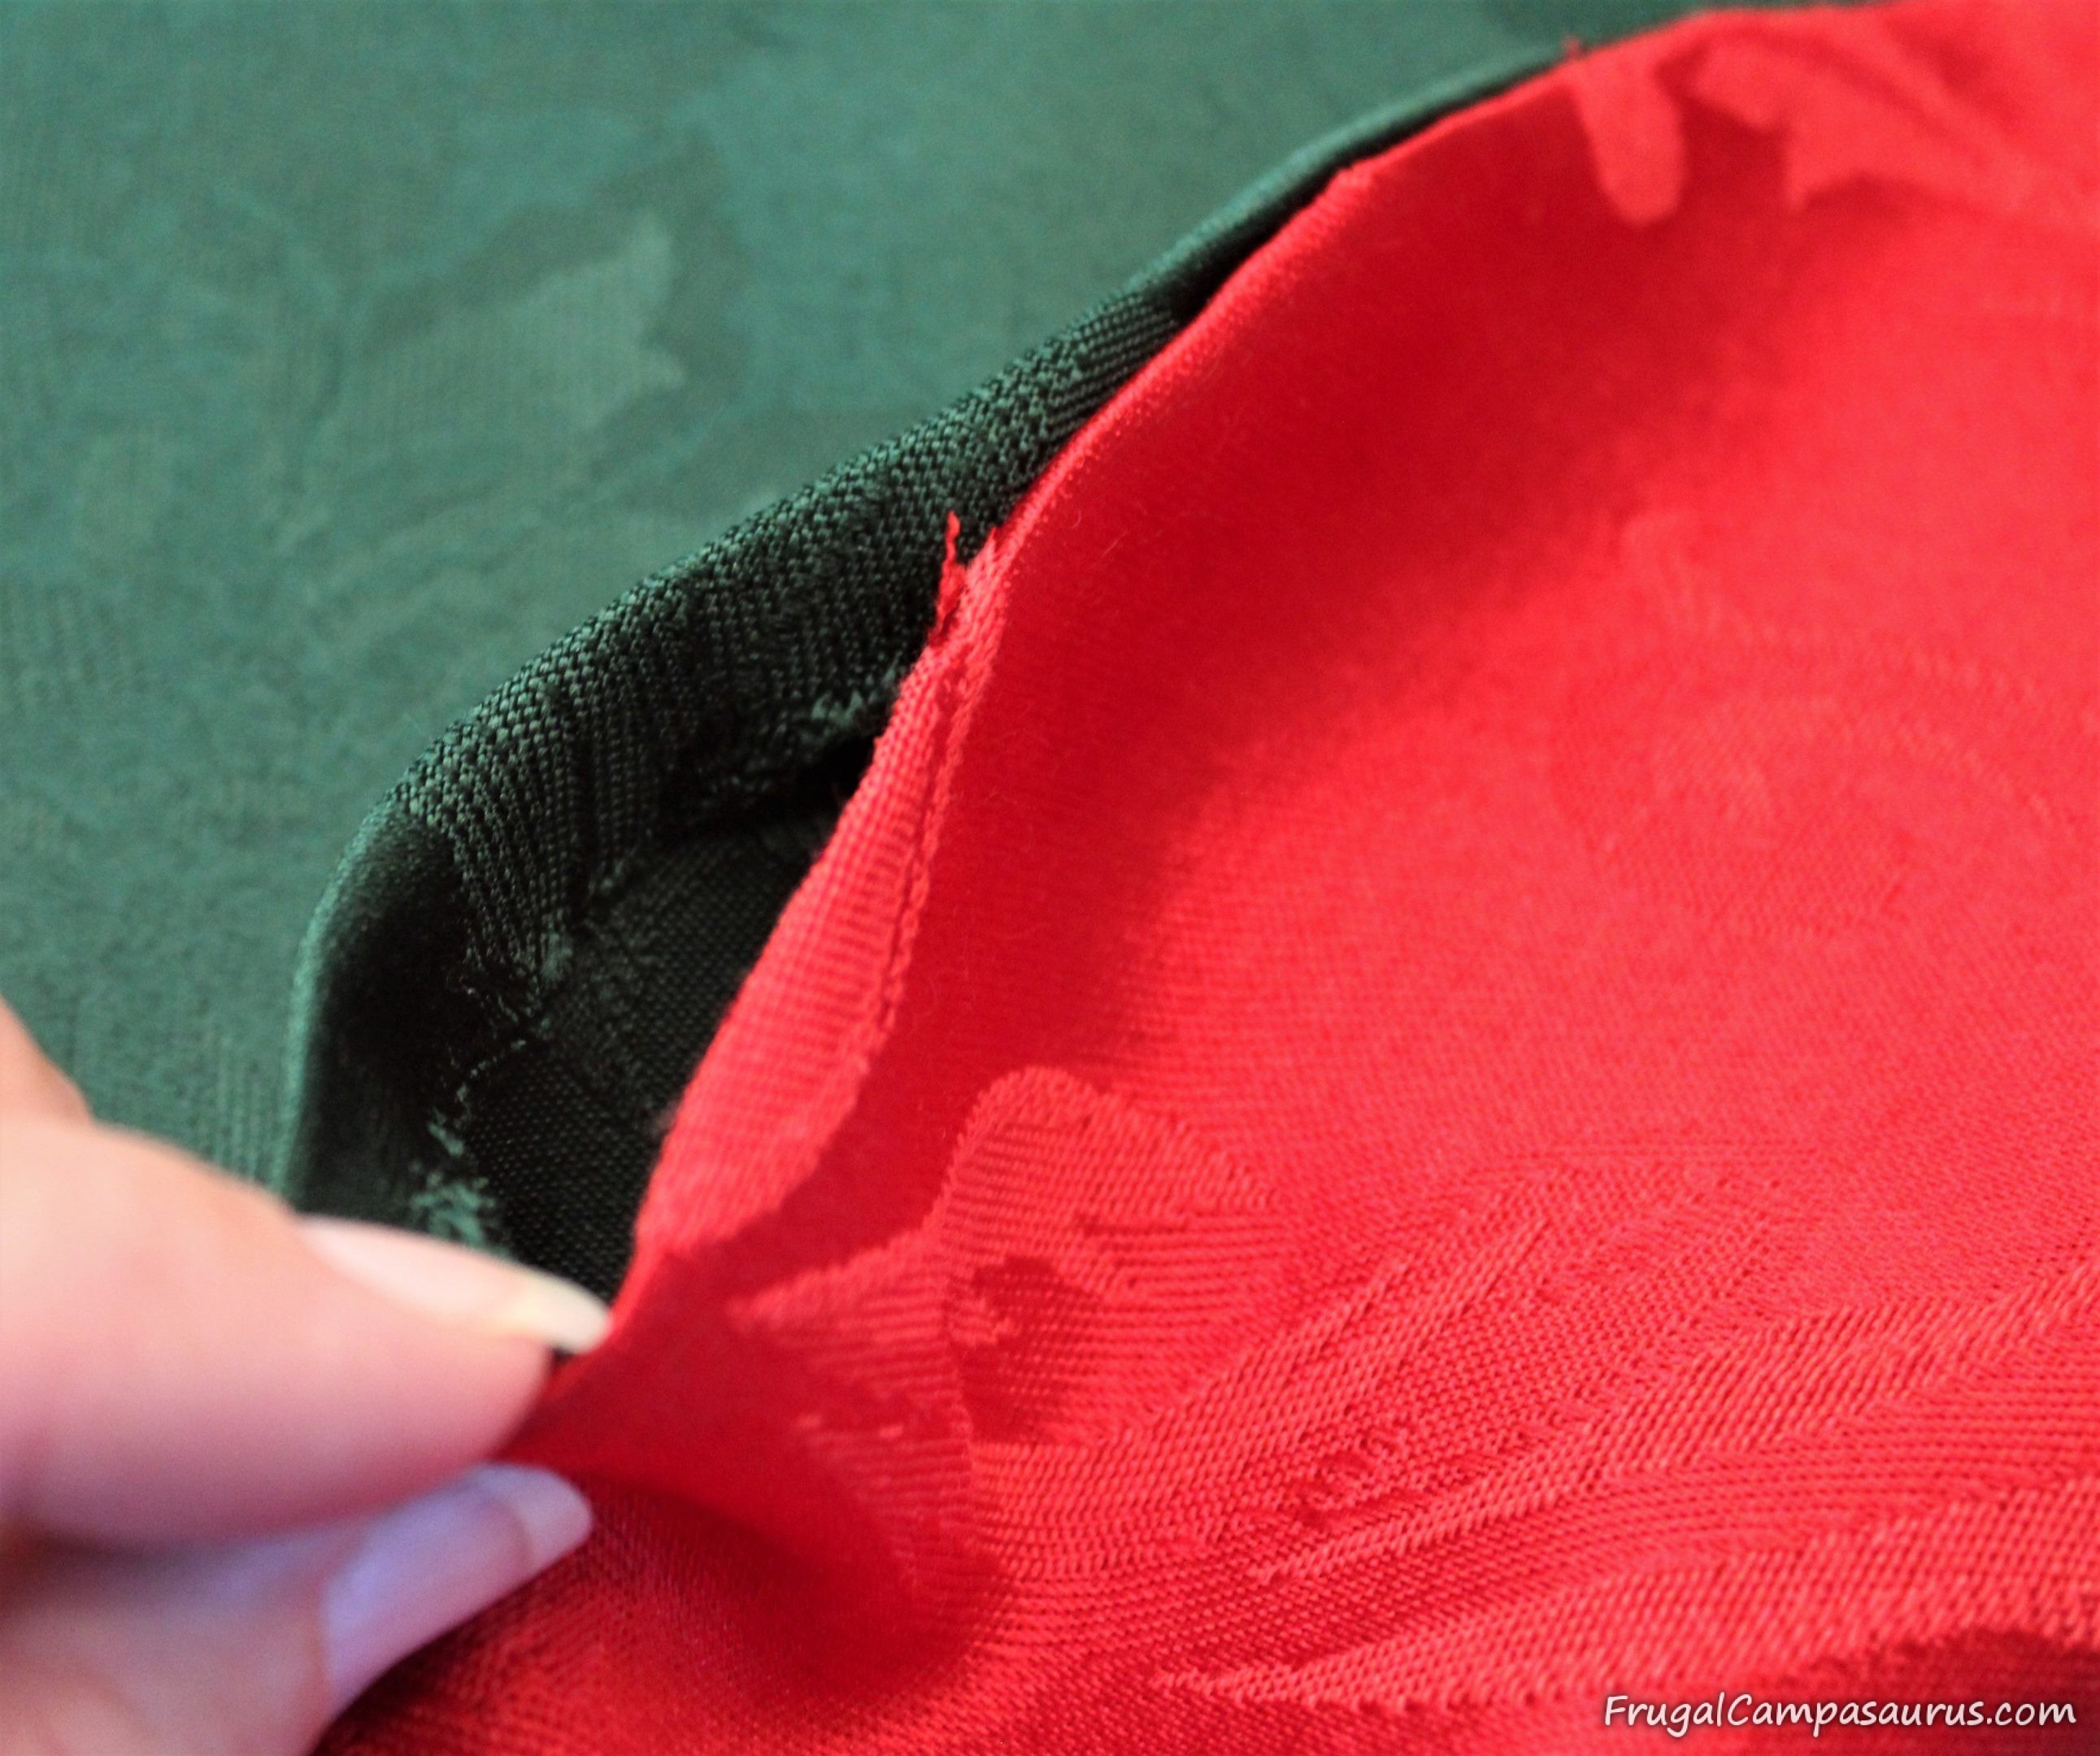
I trimmed the extra fabric close to the seam when I was done sewing, but I left all the extra fabric at the 3 inch gap. The extra fabric will make it easier to tuck inside and finish sewing later.
After trimming and turning inside out, I ironed the circle napkins. They looked like flat balloons. The extra fabric, at the 3 inch gap, gets folded inside and ironed flat. When I make bean bags or rice heaties, I sew close to the edge and seal the gap, but the decorative stiches will seal it on the circle napkins.
Now the fun part!
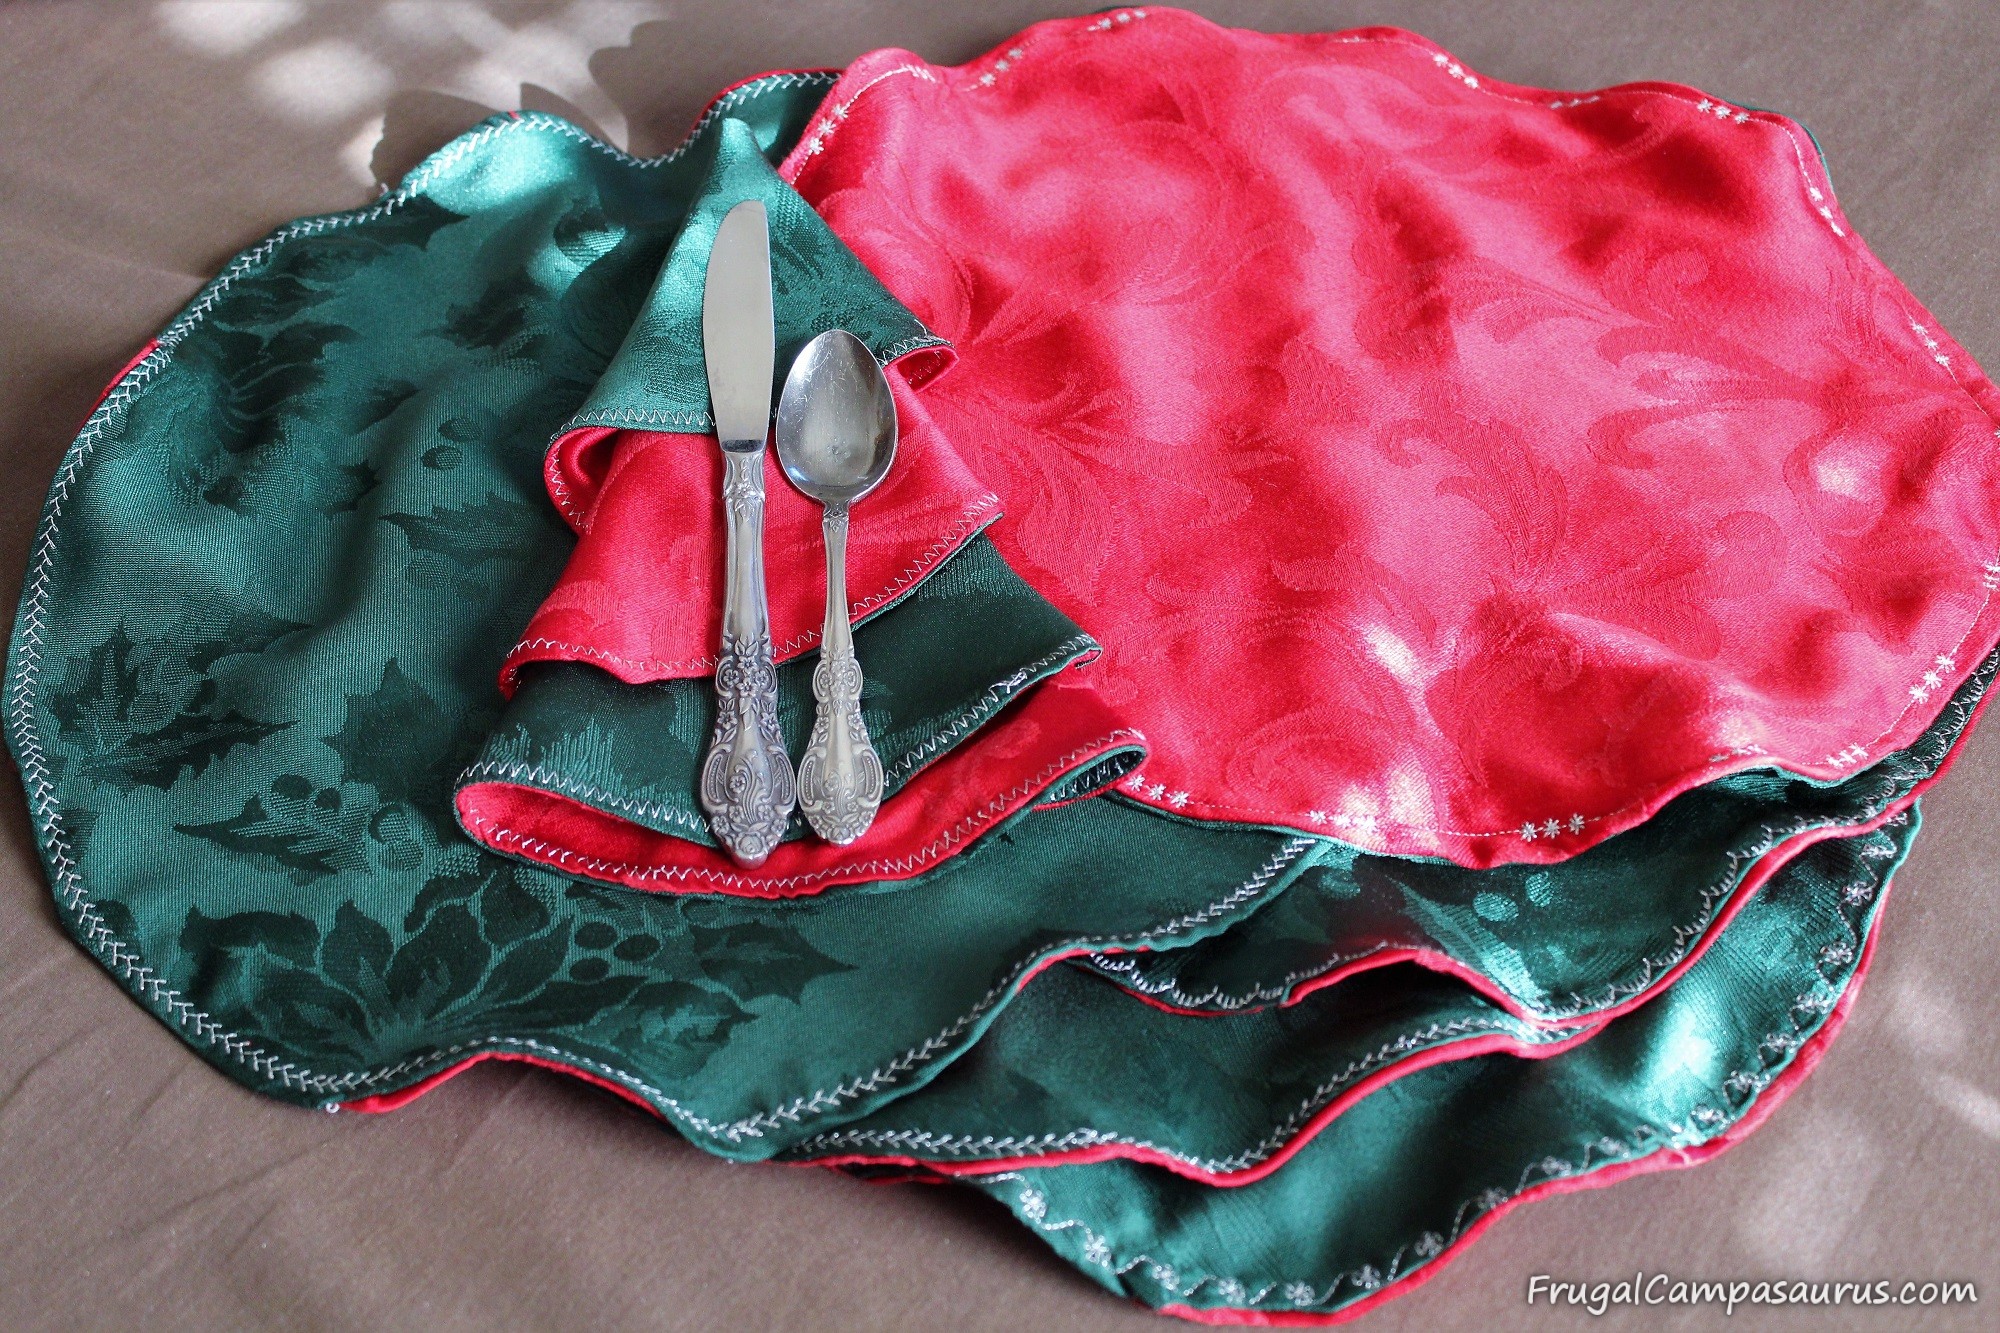
My sewing machine makes 50 stitches, some of them are pretty, but I usually use only 2 stitches-straight and zigzag. I was excited to put in the pretty silver thread and try a few new stitches. I also made sure to put silver thread in the bobbin, so the napkins are pretty on both sides.
I even took the time to do a sample piece, usually I just start sewing. I’m very glad I made a sample piece with extra fabric; a few of the stitches were heavier than I liked. I picked 4-5 different stitches to edge the napkins. I included a zigzag stitch, since some sewing machines don’t have as many choices. They all turned out so pretty!
I sewed the decorative stitches close to the edge of the circle; this sealed the unsewn gap and gave me a guide to use. I was surprised to refill the bobbin twice; those pretty stitches take lots of thread! Thankfully I had enough silver thread for all 9 napkins. Even with rewinding the bobbin and sewing carefully, and slowly, I was able to finish all the napkins in 1 afternoon!
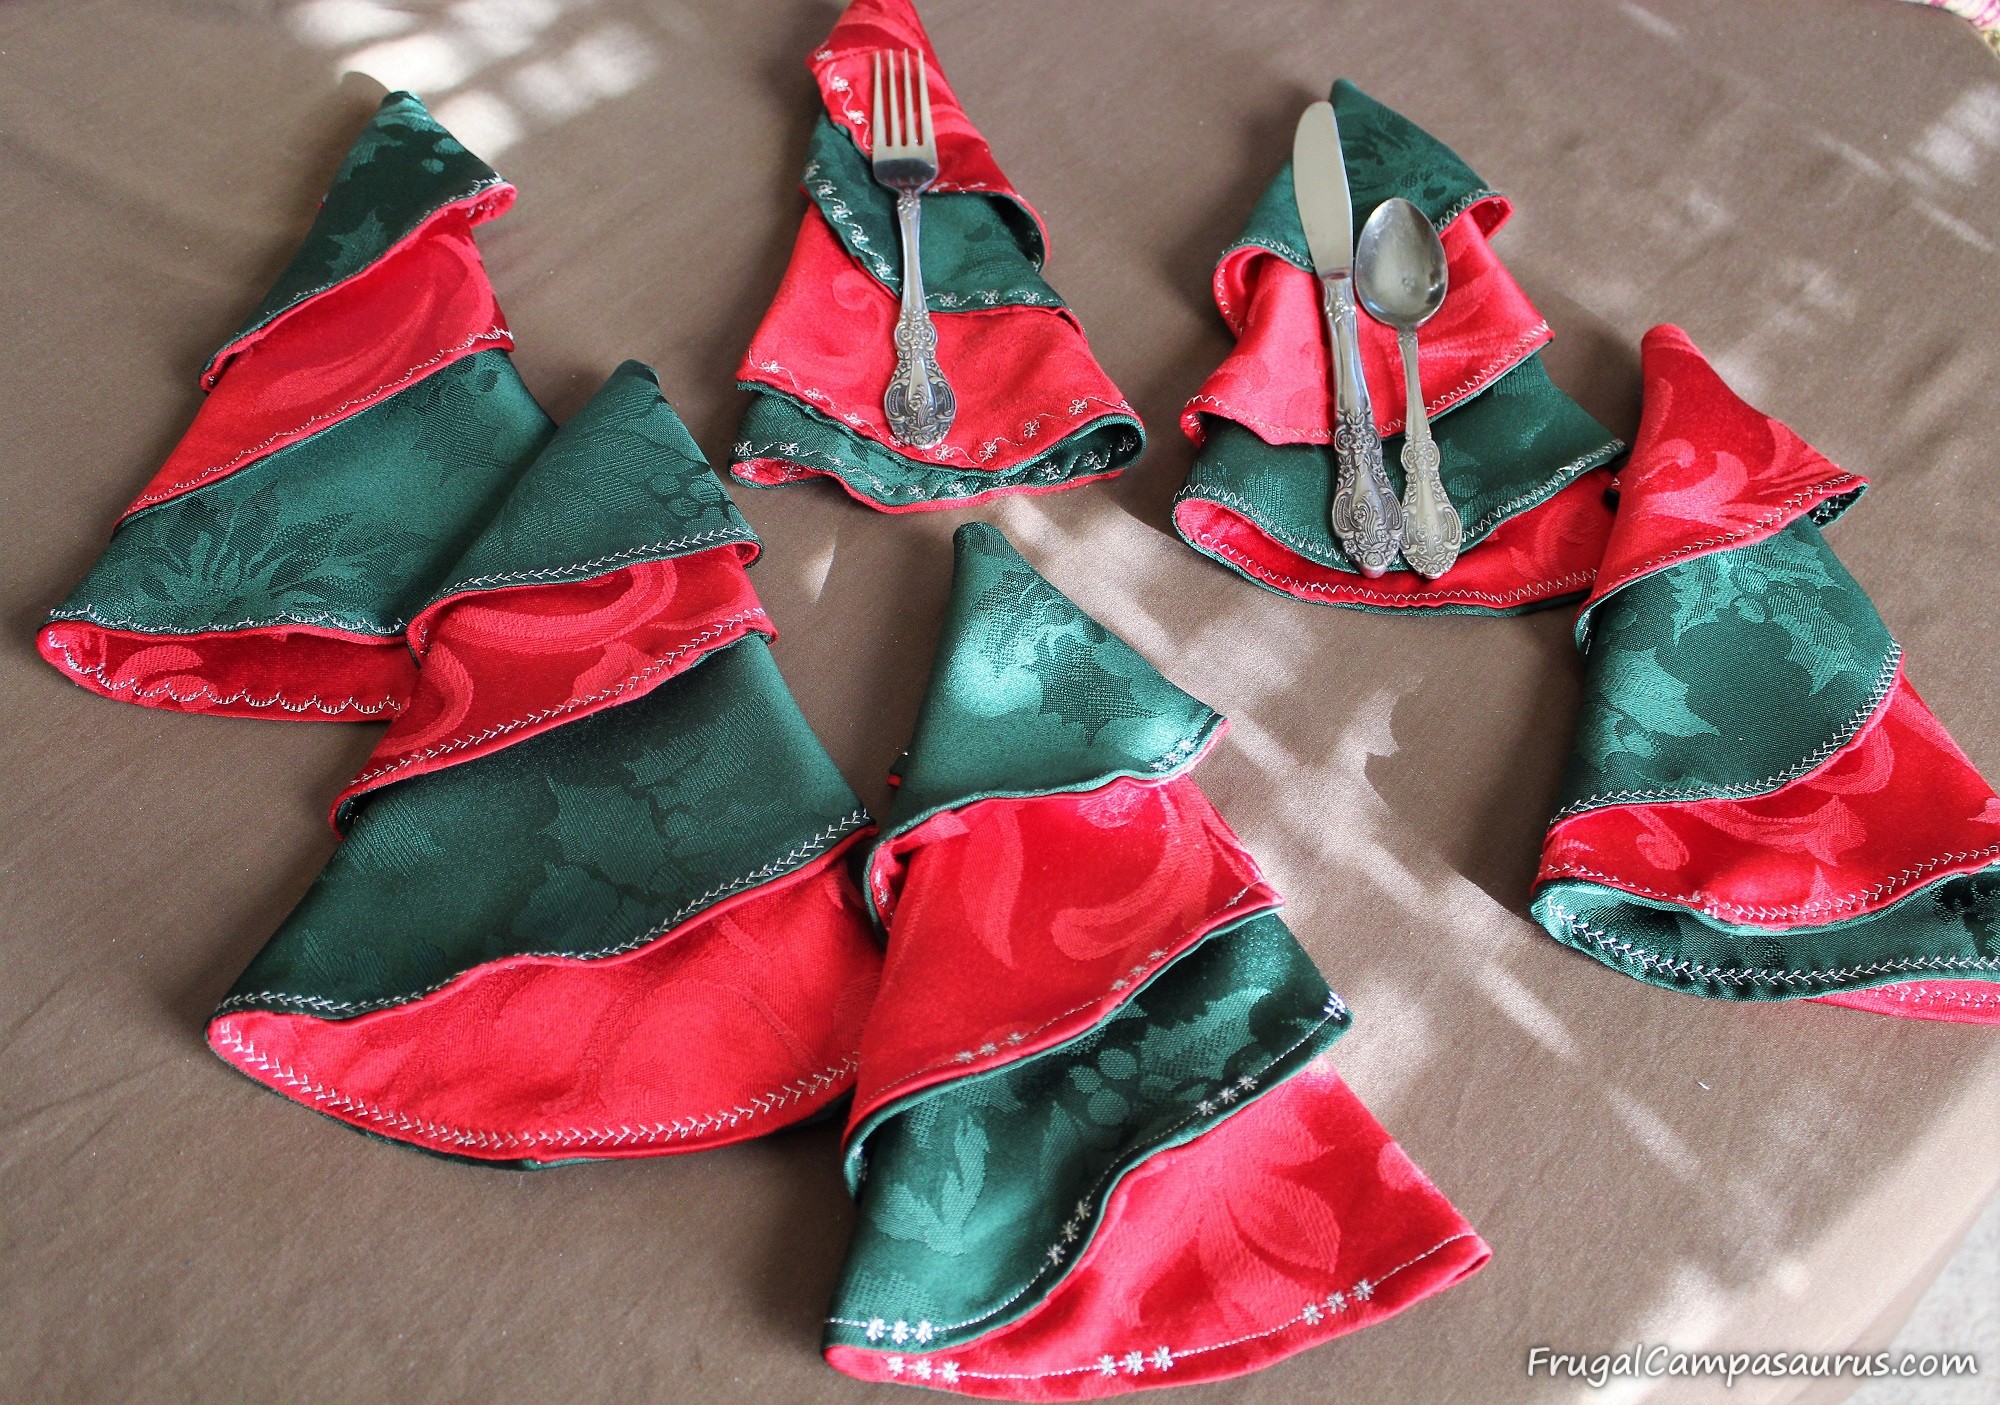
While I would have loved reindeer wrapping paper, plans change. I love my new Christmas napkins. They are so pretty and glittery; the silver stitches reminded the youngest of tinsel.
It is sooo easy to fold the circle napkins into Christmas trees! I fold the circles almost in half, leaving a small crescent shape. Grab the straight edge, 2/3rd of the way up and then grab the crescent side 1/4th of the way up. Lift the napkin, then fold the fabric under and around to form a tree shape. Sometimes, there is extra to tuck under.
Even though the 25th of each month seems to come quicker, now that I started the Year Round Christmas Challenge, I am glad that I did. The challenge motivated me to finish our Christmas napkins, something I have wanted to do for 3 years! They look so pretty that I can’t wait to use them, maybe Father’s Day could have a sparkly green and red theme?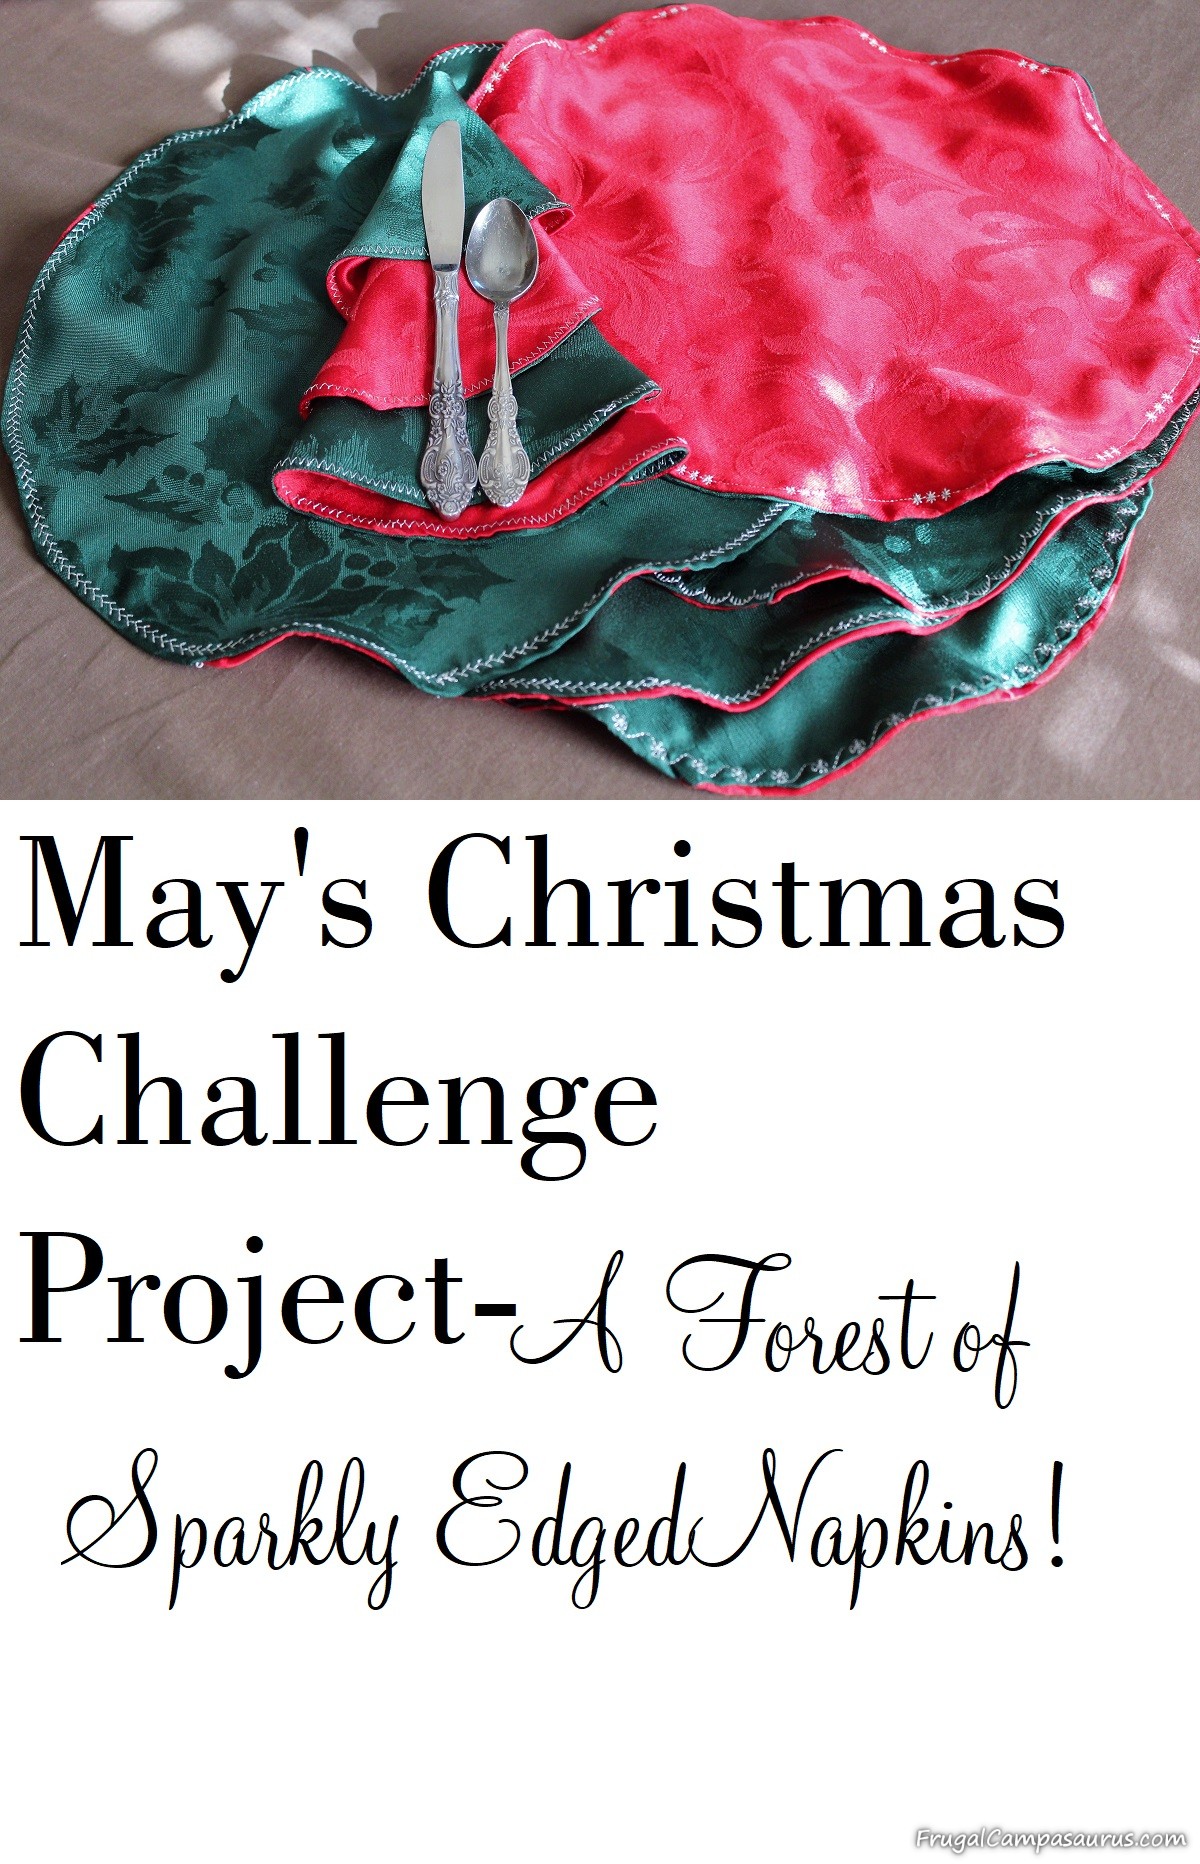
Happy Camping (or changing plans!)
Frugal Campasaurus